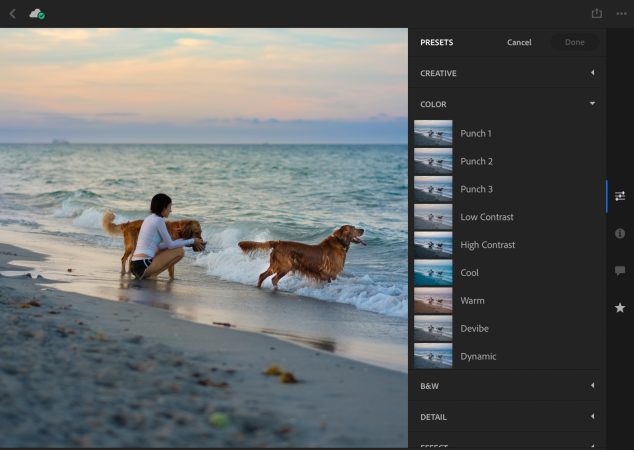
With presets it will be easier in every filter editing compared to setting it manually. But how to use presets on lightroom mobile? Actually, the method is very easy for those who already know the ins and outs of the lightroom application, but this tutorial is aimed at friends who are new and don’t know at all.
That’s why digimaz just go to the tutorial, here is how to use presets on lightroom mobile. Therefore, take a look at the discussion of this article carefully. Here is the review for you.
What Are Lightroom Presets?
Adobe Lightroom is one of the most popular photo editing software today, photographers and content creators. For beginners, Adobe Lightroom can feel more difficult to use than other photo editing applications, such as Vsco, Snapseed, and Photo Lab. But, its sophistication cannot be ignore. There are many aspects that you can manage with that Adobe-made application. One of them must have been related to color tones.
Many people crave uniform color tones on their Instagram feeds. However, it is difficult to do if the original photo has a much different color. Once you edit it in Lightroom, it’s not certain that you can get similar color tones in other photos. Therefore, use Lightroom presets.
How to Use Presets in Lightroom Mobile
Xmp is one of the extensions that can be read by the lightroom application. But to be legible, it takes several steps in installing it. However, you don’t need to be confuse about installing it, because I will give you an additional tutorial on how to install lightroom presets slowly to make them easier to understand. Before proceeding you must already have the file first, for example please download the celebgram lightroom presets that I have shared before.
- First dowload the file above that I have provided, later the fike will be in the form of . Zip
- Next move that zip file to the Android ≫ Data folder ≫ com.adobe.lrmobile ≫ Files ≫ carouseldocuments ≫ 000000000000000 ≫ Profiles ≫ Settings ≫ Userstyles paste the zip file into the Userstyles folder.
- After that Ekstark file it can use the application Zharchiver or Winrar
- Finish
If the files have been extracte successfully, please open your lightroom application, then enter the photo you want to edit and then select a preset. There will be a preset that we have added earlier.
How to Enter Lightroom Android DNG Mobile Presets
Dng is also the same as xmp which has been previously discusse, but to use lightroom dng presets is easier compare to xmp.
Previously you must have prepare a Dng file in the form of a raw image that can be downloade for free via our web, please just search for it. If it has been set up follow How to Use Lightroom Presets android below.
- Prepare the DNG file and store it in the memory of your smartphone
- Then open the lightroom application please select add photo
- Look for photos of DNG files that were previously set up
- After that open the dng file through lightroom and press the three dots in the upper right corner and select copy settings or presets
- If it’s been successfully copie out of that photo and find your photo you want to edit
- When it is open, just click the three dots above the right corner then select paste settings
- Done, if you want to edit other photos. Just open the photo you want to edit and then select paste the settings again, and so on. That’s how to install lightroom presets/formulas.
Thus our discussion regarding how to use presets in lightroom mobile and dng, hopefully the information I provide can be useful for friends.
